![]()
![]()
![]()

Amazon Simple Queue Service (SQS) is a fully managed message queuing service provided by Amazon Web Services (AWS) that enables you to decouple and scale microservices, distributed systems, and serverless applications.
The ballerinax/aws.sqs package allows developers to interact with Amazon SQS seamlessly using Ballerina. This connector provides capabilities to send, receive, delete messages, and manage SQS queues programmatically.
Log into the AWS Management Console. If you don’t have an AWS account yet, you can create one by visiting the AWS sign-up page. Sign up is free, and you can explore many services under the Free Tier.
-
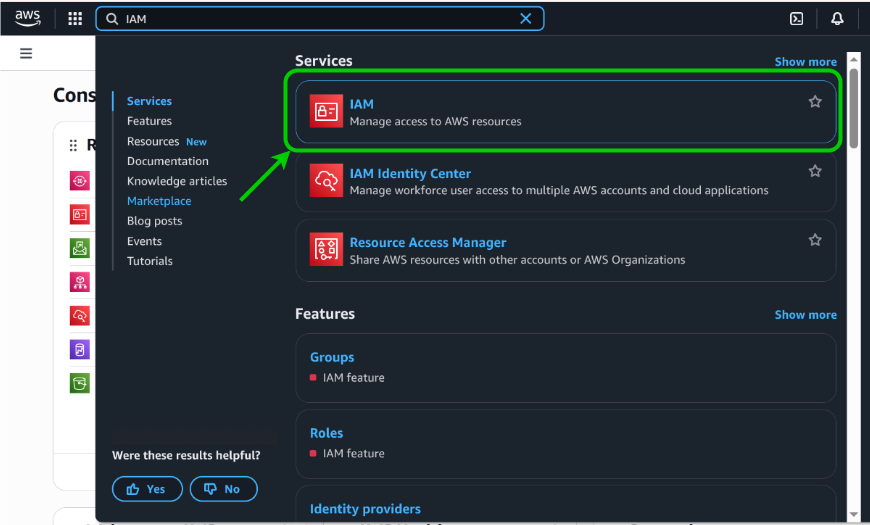
In the AWS Management Console, search for IAM in the services search bar.
-
Click on IAM
-
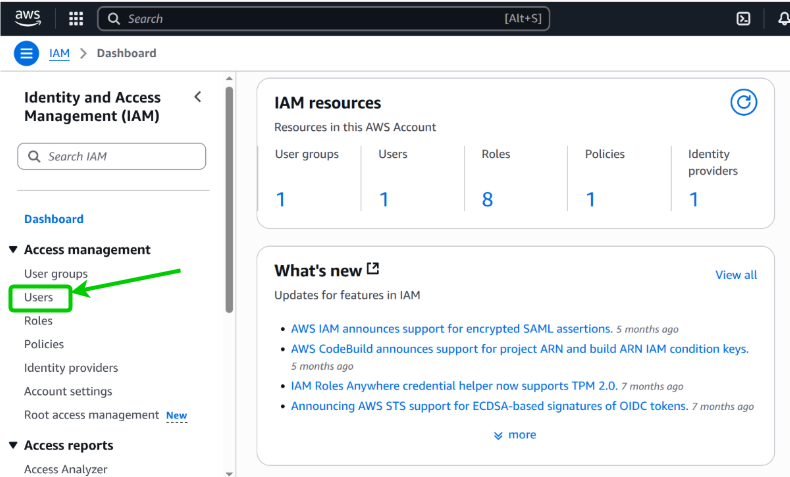
Click Users
-
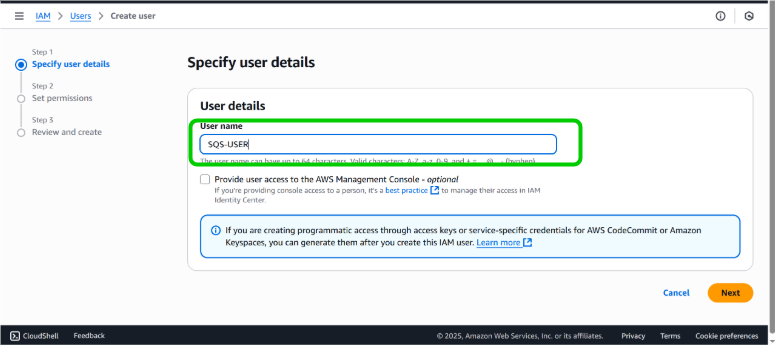
Click Create User

-
Provide a suitable name for the user and continue
-
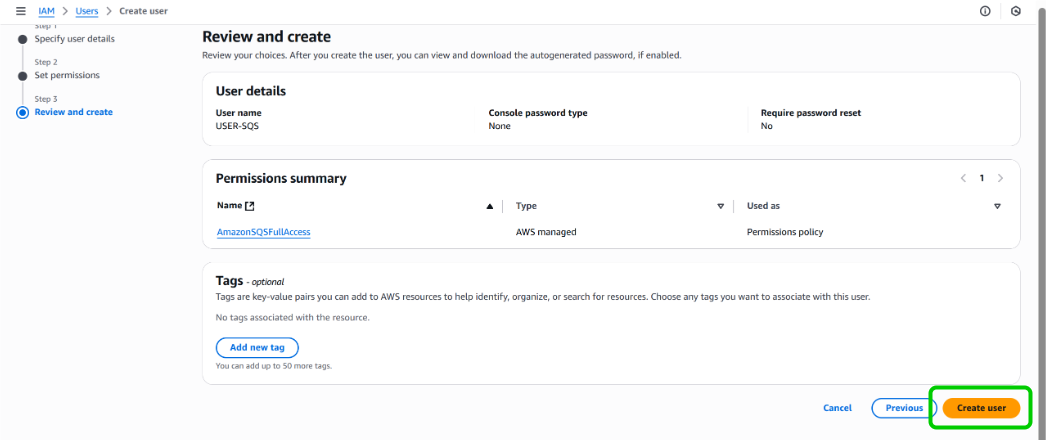
Add necessary permissions by adding the user to a user group, copy permissions or directly attach the policies. And click next.

-
Review and create the user
-
Click the user that created
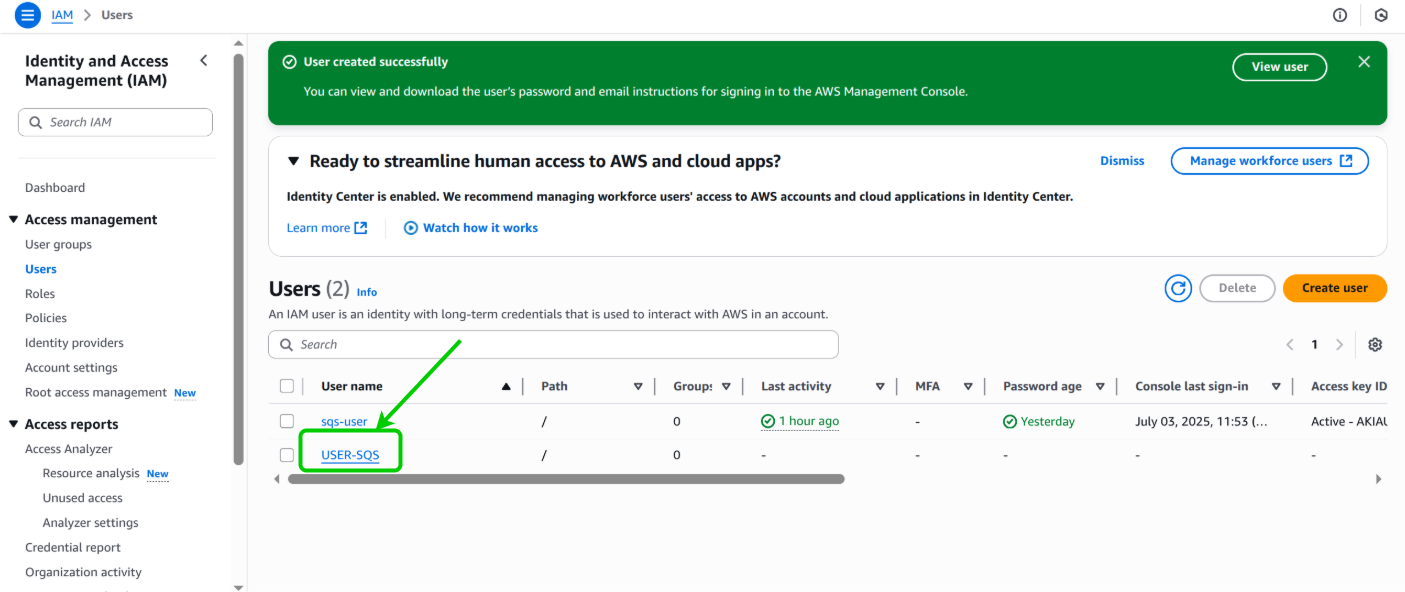
-
Click
Create access key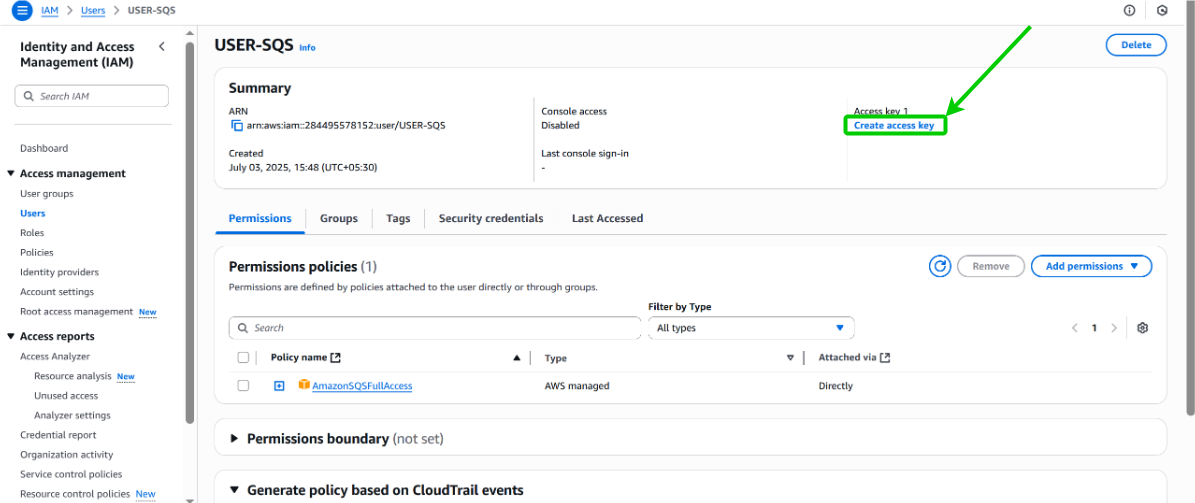
-
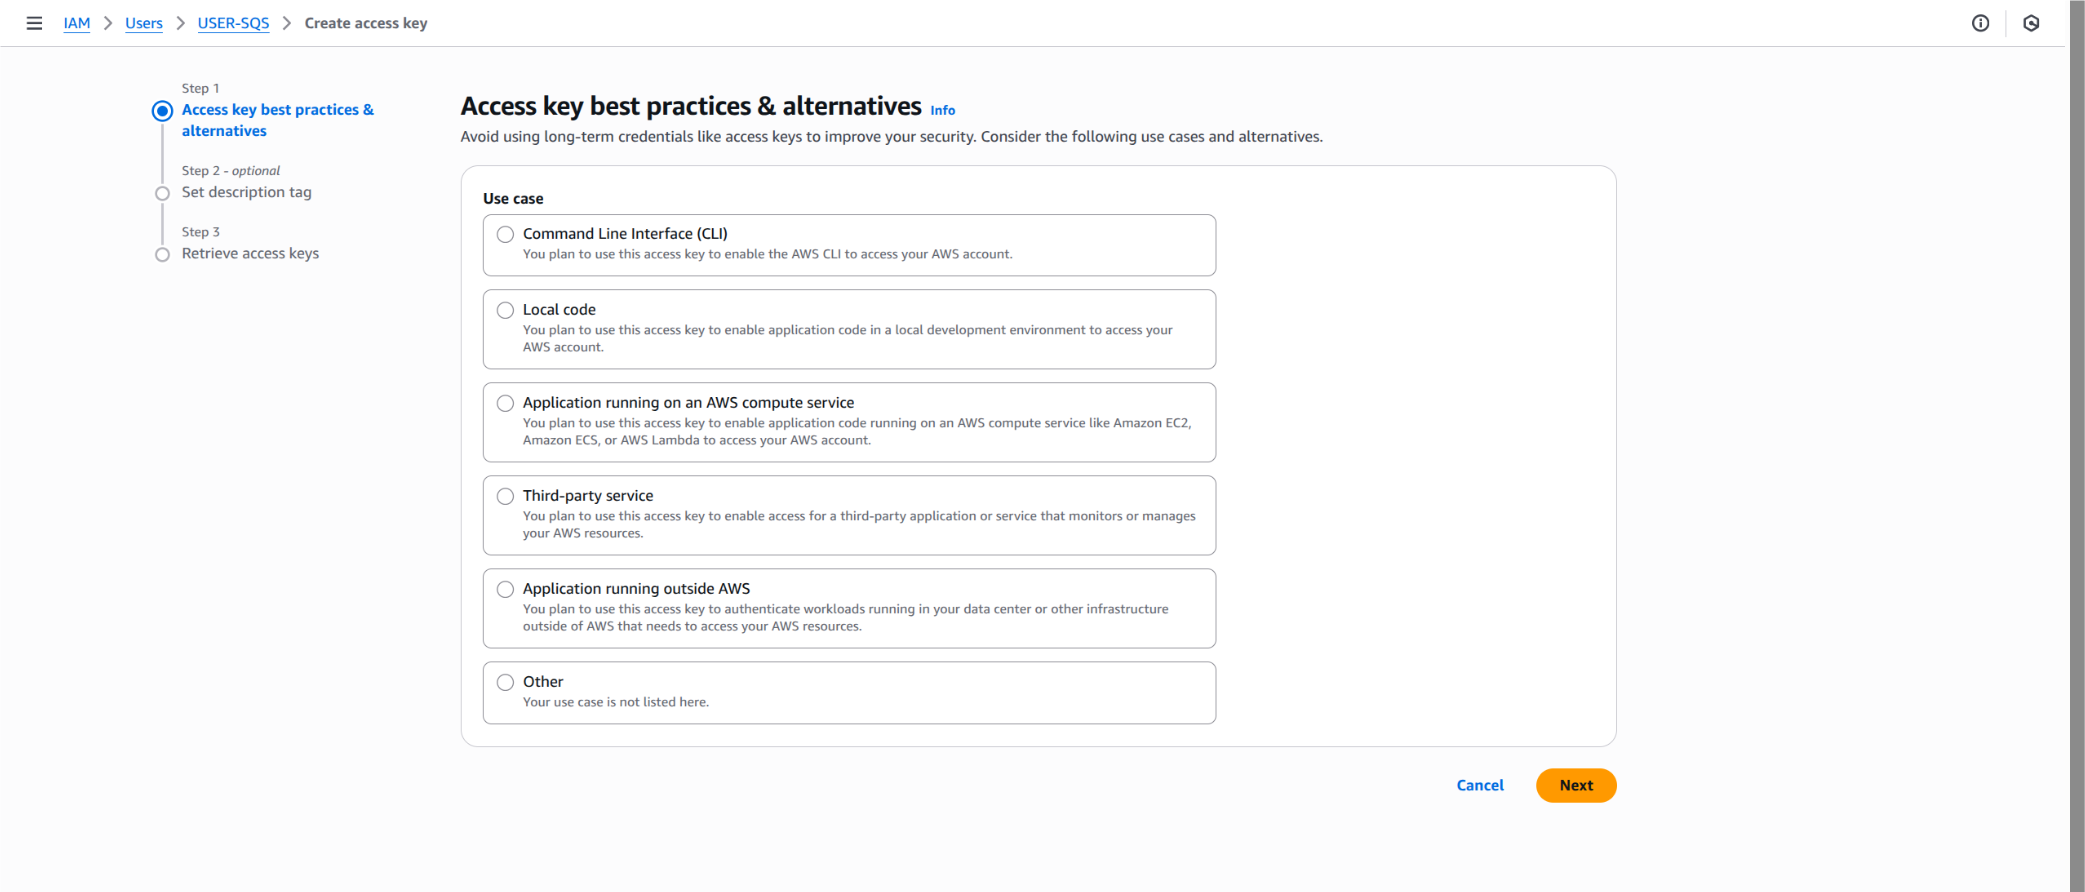
Click your use case and click next.
-
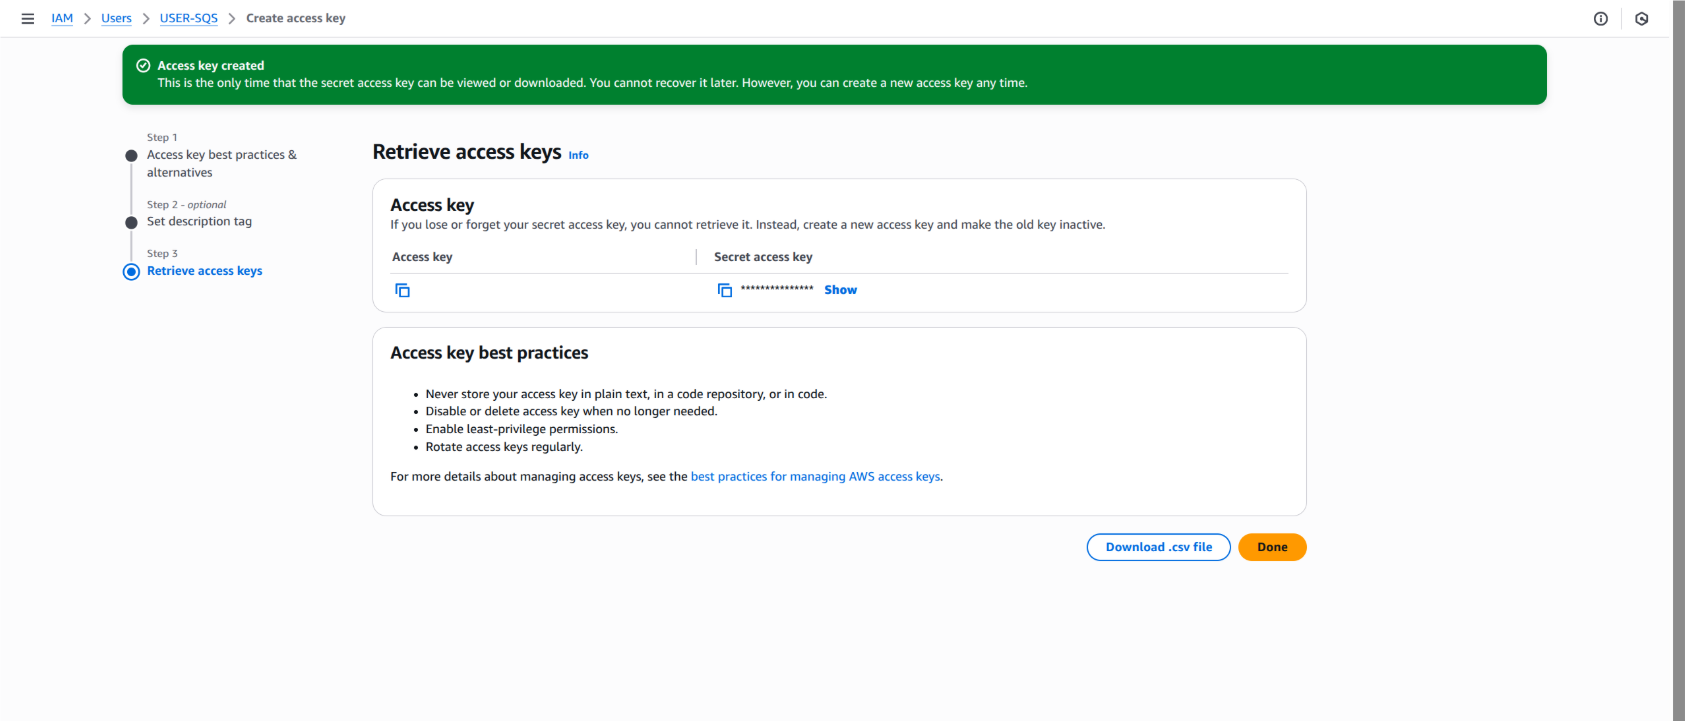
Record the Access Key and Secret access key. These credentials will be used to authenticate your Ballerina application with Amazon SQS.
To use the aws.sqs connector in your Ballerina project, modify the .bal file as follows.
import ballerinax/aws.sqs;Create a new sqs:Client by providing the region and authentication configurations.
configurable string accessKeyId = ?;
configurable string secretAccessKey = ?;

sqs:Client sqsClient = check new ({
   region: sqs:US_EAST_1,
   auth: {
      accessKeyId,
      secretAccessKey
   }
});You can use AWS profile-based authentication as an alternative to static credentials.
sqs:Client sqsClient = check new ({
   region: sqs:US_EAST_1,
   auth: {
      profileName: "myAwsProfile",
      credentialsFilePath: "/path/to/custom/credentials"
   }
});
Note: Ensure your AWS credentials file follows the standard format.
[default]
aws_access_key_id = YOUR_ACCESS_KEY_ID
aws_secret_access_key = YOUR_SECRET_ACCESS_KEY

[myAwsProfile]
aws_access_key_id = ANOTHER_ACCESS_KEY_ID
aws_secret_access_key = ANOTHER_SECRET_ACCESS_KEY
Now, utilize the available connector operations.
string queueUrl = check sqsClient->createQueue("my-test-queue");sqs:SendMessageResponse response = check sqsClient->sendMessage(queueUrl, "Hello from Ballerina!");sqs:Message[] messages = check sqsClient->receiveMessage(queueUrl);check sqsClient->deleteMessage(queueUrl, receiptHandle);// Send multiple messages at once
sqs:SendMessageBatchEntry[] entries = [
{id: "msg1", body: "First message"},
{id: "msg2", body: "Second message", delaySeconds: 5}
];
sqs:SendMessageBatchResponse batchResponse = check sqsClient->sendMessageBatch(queueUrl, entries);
// Delete multiple messages at once
sqs:DeleteMessageBatchEntry[] deleteEntries = [
{id: "del1", receiptHandle: "receipt-handle-1"},
{id: "del2", receiptHandle: "receipt-handle-2"}
];
sqs:DeleteMessageBatchResponse deleteResponse = check sqsClient->deleteMessageBatch(queueUrl, deleteEntries);// List all queues
sqs:ListQueuesResponse queues = check sqsClient->listQueues();
// Get queue attributes
sqs:GetQueueAttributesResponse attributes = check sqsClient->getQueueAttributes(queueUrl);
// Set queue attributes
sqs:QueueAttributes newAttributes = {
visibilityTimeout: 300,
messageRetentionPeriod: 1209600 // 14 days
};
check sqsClient->setQueueAttributes(queueUrl, newAttributes);
// Delete a queue
check sqsClient->deleteQueue(queueUrl);For First-In-First-Out (FIFO) queues, you need to provide additional parameters:
// Create a FIFO queue
sqs:QueueAttributes fifoAttributes = {
    fifoQueue: true,
    contentBasedDeduplication: true
};
string fifoQueueUrl = check sqsClient->createQueue("my-fifo-queue.fifo", queueAttributes = fifoAttributes);

// Send message to FIFO queue
sqs:SendMessageResponse fifoResponse = check sqsClient->sendMessage(
    fifoQueueUrl,
    "FIFO message",
    messageGroupId = "group1",
    messageDeduplicationId = "unique-id-1"
);Use the following command to compile and run the Ballerina program.
bal runThe ballerinax/aws.sqs connector provides practical examples illustrating usage in various scenarios. Explore these examples:
- Basic Queue Consumer – Demonstrates creating a standard SQS queue, sending messages, and consuming them using a Ballerina listener.
- Basic Queue Operations – Shows how to create a queue, send, receive, and delete messages, and delete the queue.
- Advanced Messaging Features – Demonstrates advanced messaging features such as message attributes, batch sending, and custom queue attributes.
- FIFO Queue – Shows how to work with FIFO queues, including sending messages with different
messageGroupIds and grouping received messages.
-
Download and install Java SE Development Kit (JDK) version 21. You can download it from either of the following sources:
Note: After installation, remember to set the
JAVA_HOMEenvironment variable to the directory where JDK was installed. -
Download and install Ballerina Swan Lake.
-
Download and install Docker.
Execute the commands below to build from the source.
-
To build the package:
./gradlew clean build
-
To run the tests:
./gradlew clean test -
To build the without the tests:
./gradlew clean build -x test -
To debug package with a remote debugger:
./gradlew clean build -Pdebug=<port>
-
To debug with the Ballerina language:
./gradlew clean build -PbalJavaDebug=<port>
-
Publish the generated artifacts to the local Ballerina Central repository:
./gradlew clean build -PpublishToLocalCentral=true
-
Publish the generated artifacts to the Ballerina Central repository:
./gradlew clean build -PpublishToCentral=true
As an open-source project, Ballerina welcomes contributions from the community.
For more information, go to the contribution guidelines.
All the contributors are encouraged to read the Ballerina Code of Conduct.
- For more information go to the
aws.sqspackage. - For example demonstrations of the usage, go to Ballerina By Examples.
- Chat live with us via our Discord server.
- Post all technical questions on Stack Overflow with the #ballerina tag.