Build_Extruder_Carriage
- Bondtech Prusa i3 MK2.5S Upgrade Kit
NOTE: All the hardware used are flathead screws
- M3x10mm - 1ea
- M3x12mm - 1ea
- M3x35mm - 2ea
- M3x40mm - 1ea
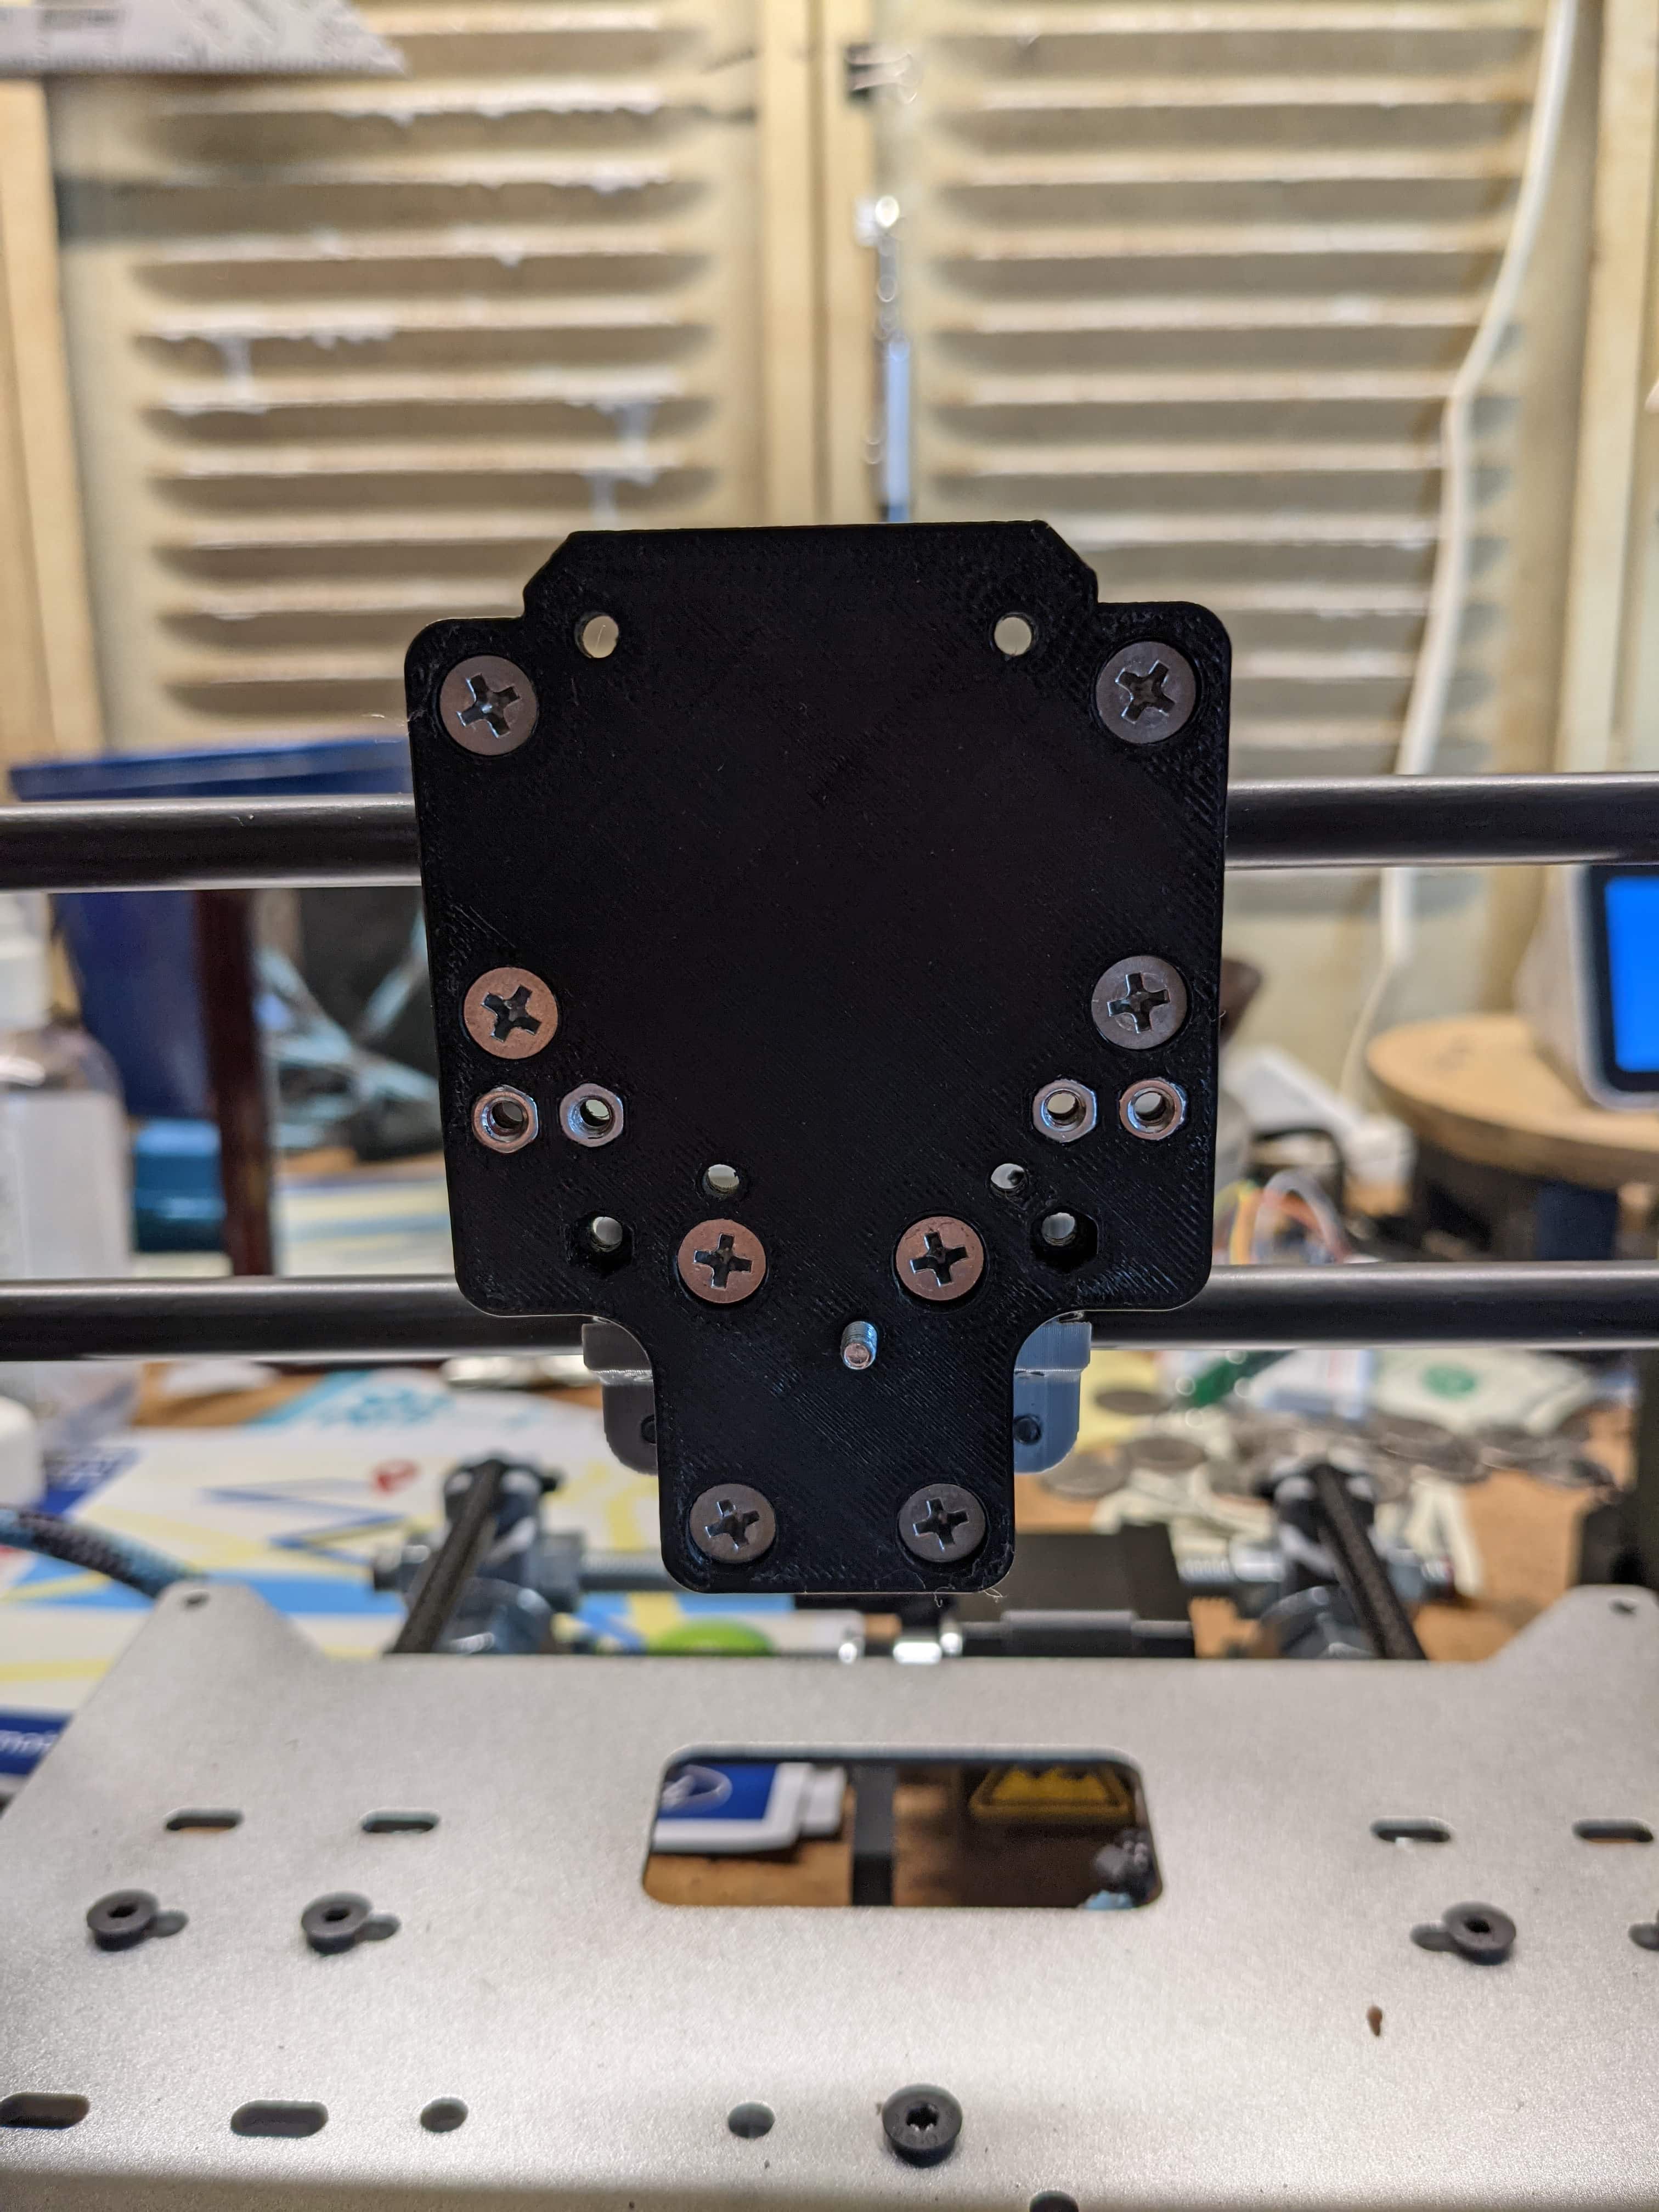
Begin by installing the plate onto the bearing blocks, and make sure to pre-install a M3x10mm screw in the bottom hole as shown above.

Next, insert a M3 hex nut from the upgrade kit into the small hole on the backside of the extruder body and using the screw you pre-installed in Step 1, screw the body into place. Then, rotate the body until you're able to see through the top left mounting hole, to make sure everything is lined up.

Once the back part of the extruder body is in place, you can go ahead and install the hotend into it's new home. Make sure to rotate the hotend and orient it the way you want to make cable management easier later on.

Press the front part of the extruder body into place, and make sure everything is flush.
Then, begin fastening the rest of the extruder body as follows:
The top holes require a M3x40mm & M3x12mm screw.
The middle holes both use a M3x35mm screw.

Install the ABL sensor into it's new home, secure it in place by fastening down the screw and using a zip-tie as shown above.